Pulling up old tiles from a concrete slab can feel like a slog. With the right set-up and tools, though, it’s a job you can tackle without wrecking the slab.
Whether you’re refreshing a showroom, upgrading a factory floor or helping a client renovate their home, this guide shows you how to take up tile from concrete while keeping damage and dust to a minimum.
You’ll get the safety essentials, the tools that help, a step-by-step process, and practical tips to keep the work quicker and cleaner.
Prepare and Protect: Safety First
Before you start, take a moment to prepare the space. It’ll make the job safer and save you hassle later.
- Clear the area – Move furniture, appliances and rugs out of the room. Remove baseboards and transition strips so you can reach the tile edges.
- Control dust – Switch off HVAC systems and seal vents and doorways with plastic
- Wear protective gear – At a minimum, you’ll need safety glasses, a dust mask or respirator, cut-resistant gloves, long sleeves, long trousers and closed-toe boots. Knee pads and hearing protection are also advisable.
- Check for asbestos – If the tiles or adhesive date from before 1980, consult an asbestos specialist. Disturbing asbestos without proper controls is illegal and hazardous.
- Identify tile type and adhesive – Ceramic and porcelain tiles are brittle, while vinyl tiles peel up with heat. Adhesives can be mastic (gummy) or thin-set mortar (hard and cement-like). Knowing what you’re dealing with helps you choose the right tools.
Gather Your Tools
The right kit makes tile removal faster and far less frustrating. At a minimum you’ll need:
| Tool/Equipment | Purpose |
| Hammer & chisel | Breaking tiles and creating a starting point |
| Pry bar or cold chisel | Lifting tiles without damaging the slab |
| Floor scraper | Removing tiles and adhesive over larger areas |
| Rotary hammer or hammer drill | Faster removal of thin-set mortar |
| Heat gun or hair dryer | Softening vinyl tile adhesive |
| Shop vac & broom | Cleaning up debris and dust |
| Angle grinder (diamond blade) or concrete grinder | Removing stubborn mortar and levelling the surface |
| Dual pressure cleaner or power washer | Final wash down of the slab |
If you’re working on a bigger commercial area, hiring specialist equipment can make a noticeable difference. Multiquip UK’s surface preparation range includes dual pressure cleaners and jackhammer trolleys that speed up tile removal and surface cleaning.
Hiring equipment also lets you try before you buy, with hire fees credited against a future purchase.
Related Read: Exploring the Essential Tile Removal Tools

Step-by-Step on How to Remove Tile From Concrete
1. Create a Starting Point
If the grout is loose, start there. If not, pick a corner tile and tap it with a hammer and cold chisel until it cracks.
Hold the chisel at a roughly 45° angle, strike until the tile fractures, then pry up a small section to create a working edge.
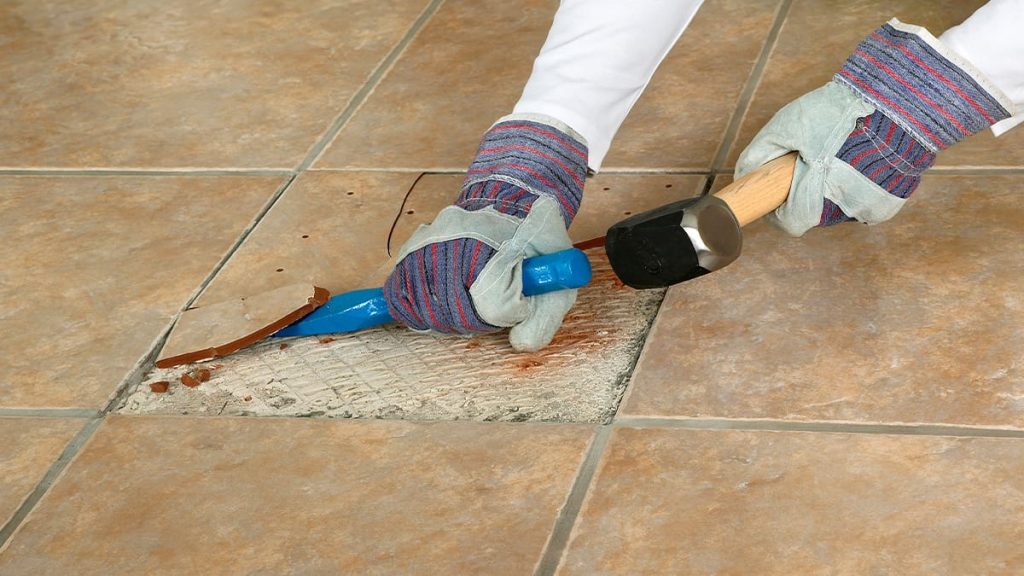
2. Break and Remove Tiles
For a small residential area, a hammer and chisel can do the job. Crack the tile, then lever the pieces free, keeping the chisel angled so you don’t gouge the concrete subfloor.
For larger areas or stubborn thin-set, use a hammer drill with a chisel attachment to speed things up. Work steadily from your starting point, sliding a floor scraper or pry bar under each tile as you go.
Ride-on or walk-behind scrapers can remove tiles quickly over large areas, but they’re an investment. Multiquip can advise on the right scraper for your site.
3. Remove Vinyl Tiles
Vinyl and linoleum tiles usually lift differently. Pry up a corner with a putty knife, slide a scraper underneath and lift.
If the adhesive won’t let go, warm stubborn areas with a heat gun to soften it, then peel up the tiles and discard responsibly.
4. Strip Off Adhesive
You’ll need to remove the adhesive so new flooring can bond properly.
For mastic, scrape with a long-handled floor scraper or putty knife. Hot water or a commercial mastic remover can help with stubborn patches.
Thin-set mortar needs more force. Use a masonry chisel, rotary hammer or grinder. Expect dust and noise, so attach a HEPA-filtered vac to grinders and wear respiratory protection.
5. Clean and Level the Surface
Once the tiles and adhesive are gone, sweep and vacuum thoroughly. Wash the concrete with a dual pressure cleaner or power washer to remove fine dust and residues.
Before you lay anything new, check for cracks and repair them. A clean, level slab helps your next floor last longer and look better.
Best-Practical Ways on Removing Tile from Concrete
- Work in sections – Remove tiles and debris as you go to keep the area tidy and reduce tripping hazards.
- Keep it damp – Lightly spraying the area helps control dust and reduces sharp shards.
- Use mechanical aids – Floor scrapers, jackhammer trolleys and grinders reduce manual labour, speed up the job and minimise strain.
- Protect your subfloor – Avoid prying directly against the concrete; slide tools under the tile and lift.
- Dispose responsibly – Broken tiles are heavy—use sturdy containers or wheelbarrows to move debris.
- Ask for help – A second person to clear debris or operate equipment improves efficiency and safety.
When to Call the Pros, and How Multiquip Can Help
Some jobs are better handled by specialists. Large commercial areas, stubborn thin-set, or suspected asbestos are all good reasons to bring in the pros.
Multiquip UK has been supporting construction businesses for over 25 years and offers a full range of surface preparation equipment, from jackhammer trolleys to dual pressure cleaners. You can hire gear for 30 days and apply the hire cost to a purchase.
For advice or to arrange a demonstration, contact our expert team.
Bottom Line..
Removing tiles from a concrete floor isn’t glamorous, but doing it properly sets you up for a smooth, long-lasting finish.
Ready to tackle your own project? Explore our surface preparation equipment for hire or call our team for expert support.